 Loading... Please wait...
Frequently asked questions
Posted by Microtrade Australia on 15th Sep 2022
Frequently asked questions.
How do I get my products to print at specific printers?
When you setup a product you need to tell the system which printer you want the product to print at, you can specify more than one printer if you wish.
In this image you can see part of the product edit screen. The area that is circled is a button that can be clicked on.
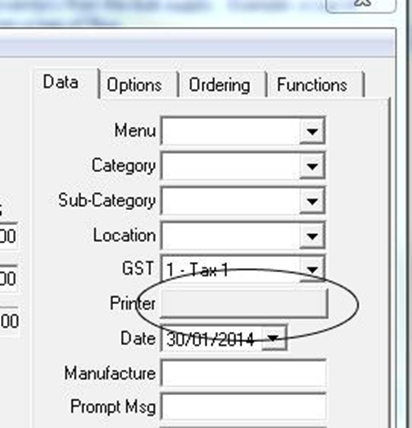
Once you click on the button a new window will open and you can select the printers that you wish this specific product to print to.
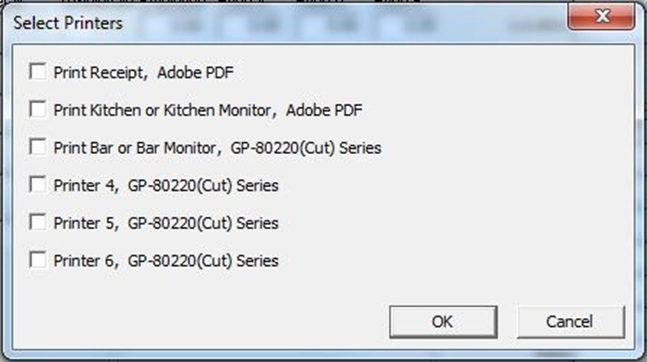
Note: I do select the “print receipt” option and any other printer that is required. For example if the product is a beer that I wish to print at the bar I tick selection boxes for the “Print Receipt and Print bar” printers.
If once you have completed the printer selection process and the product still doesn’t print then it maybe because you have not told the system that there is more than one printer installed.
To setup printers in the PowerPos system they must first be installed in Windows, once done they are available in PowerPos. To select printers that are to be used select “Manager” in the main control panel, then select file and then choose the printer that you need to setup.
See images below for setting up a Kitchen printer within PowerPos.
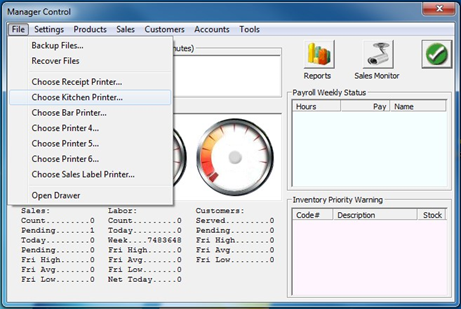
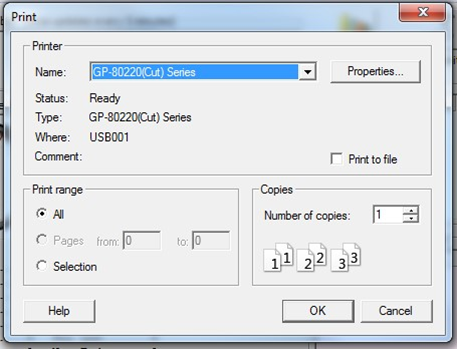
Using the drop down list choose the appropriate printer.
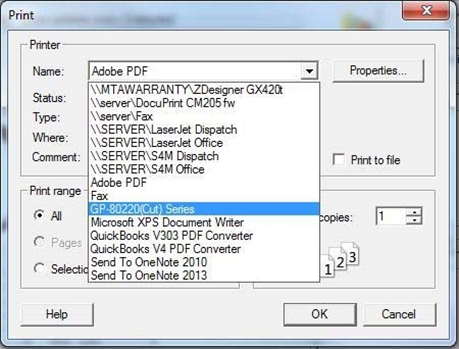
When the printer is selected (see below) click OK
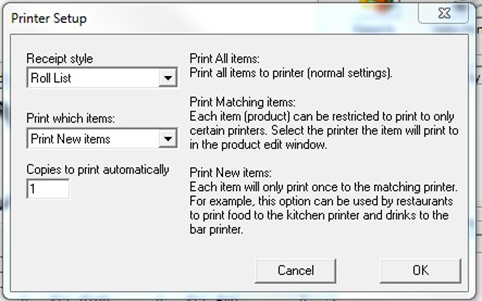
On the next screen you should select the style of printout you wish to use and for all printers except the receipt printer you should select “Print new items” and then click ok
I have the restaurant version and the kitchen and other printers have stopped printing, everything was working ok.
The most common reason for this is that someone has done something they shouldn’t. On the main control screen there are two options “Kitchen Monitor” and “Bar Monitor” If either of these options are accessed a message is displayed on the monitor (see below)
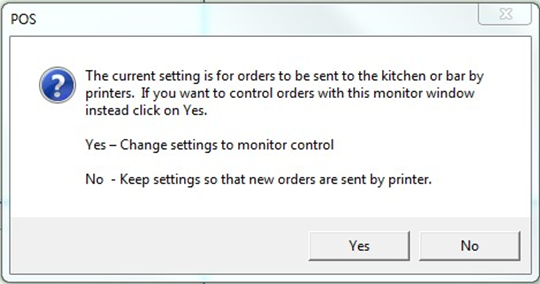
The correct answer to this question NO unless you have a system that has monitors instead of printers in the kitchen and bar.
You can check to see if someone has made this error by accessing the Manager area, Then Settings, then Printers & Equipment.
Screen image below.
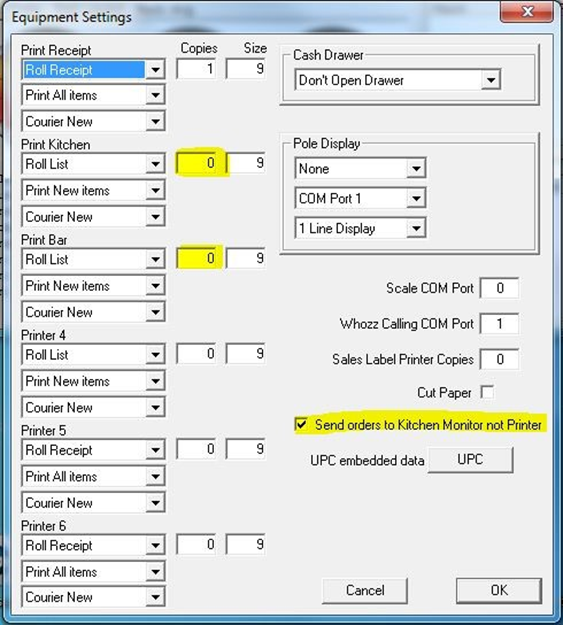
On this screen you can see that I have highlighted 3 area. If the selection “send orders to Kitchen Monitor not Printer” is selected then the kitchen and bar printers will no longer print. You should uncheck this option.
The system will also have set the Kitchen and Bar printer to print 0 (zero) copies, if you use either of these printers you will need to set the number of copies you wish to print at each of the printers.
How do stop the customer receipt printing on every transaction?
To do this you will need to access the Manager area, then select Settings Printers & Equipment.
At the top of the new screen you will see the settings for the receipt printer, simply change the number of copies to 0 (zero) to stop printing customer receipts or alternately to 2 or more if you require more than one copy.
If the customer asks for a receipt after you have set the system to not print customer receipts you can print one from the change window. (There is a Print Receipt option on the change window.)
How do I print more than 1 copy of a printout? (Receipt or order printer)
To do this you will need to access the Manager area, then select Settings Printers & Equipment.
On the new screen you will see the settings for the printers, one of the columns is titled “Copies” simply change the number of copies to 2 (or more). This will tell the system to print multiple copies to that printer.
My Cash drawer is not opening when I finish a transaction.
There is only 1 setting in PowePos that deals with the cash drawer opening.
From the “Main Control” screen select manager, then select “Settings” and then “Printers and Equipment”
In the top right hand corner there is a section for the Cash Drawer. This should be set to “Open connected to printer”. See below.

There are other things that can affect the cash drawer.
1, It relies on a printer that is correctly setup and able to print.
2, The Cash Drawer should be connected to the back of the printer and not to the computer.
I cannot order 2 items with different modifier choices.
The system by default stacks quantities, I.E if you select a product 3 times the system will show a single product purchase with an item count of 3. If you are using modifers this isn’t appropriate because it will only allow you to choose the modifiers once and then just increase the item count to 3 when additional selections of the same item are made. To resolve this we need to tell the system that everything that is selected is a unique item.
From the “Main Control” screen select “Manager” then “Settings” then “General”
On the new screen that opens in the first column about half way down is an option “One item (qty) per line” this needs to be checked. Once done this effects all products in the system, every item selected will have its own line on the order screen and also on the receipts.
Iwant to print my sales totals for a day. (Or a range of days.)
You can print sales totals from the reports screen. To get there you from the “Main Control” Screen select “Manager” then “Reports” (left most of the 3 buttons in the top right hand corner of the “Manager” Screen. This opens the “Report Center” Screen. You can now select the “Sales” option on the top left of this screen and then select “Sales…” this will open the screen below.
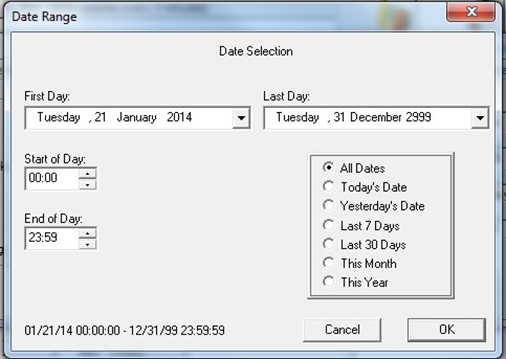
From this screen you can select a date range using the “First Day” and “Last Day” fields or you can use the quick selection box on the right. And then select OK.
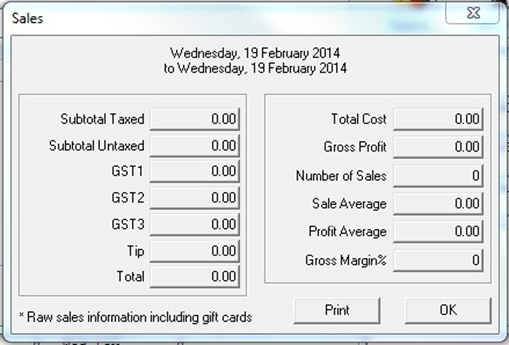
The report will be produced and displayed on screen in the format above. If a hardcopy is required simply click the print option.
I want my prices to be tax inclusive.
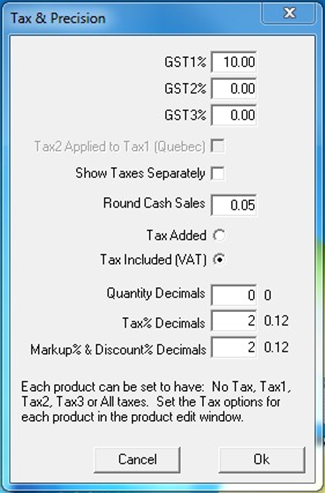
If you want to enter products with the price as tax included you will need to tell the system that you wish this to be the way tax is handled.
From the “Main Control” screen select “Manager” then “Settings” then “Tax and Precision” Click the Tax included (VAT) option in the middle of the screen.
I want to start a new transaction and suspend the one I am currently working on.
This answer related to the General Retail version and also the Restaurant version that’s NOT using table management and the sales list screen.
From the Sales screen once you have started a transaction you can select the
